
Want your images to feel atmospheric rather than literal? The keys are light and color. This is a simple, friendly guide: how to set a mood, write a usable prompt, avoid over-processing, and prep files for a gallery/lightbox. No heavy jargon—just practical tips.
Note: examples refer to artistic, SFW presentation of 18+ aesthetics.
1) Mood first, everything else second
Before you open the generator, write one sentence describing the emotion:
-
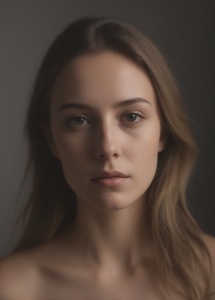
“Warm, intimate portrait lit by a soft lamp.”
-
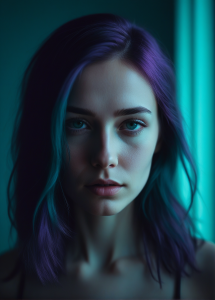
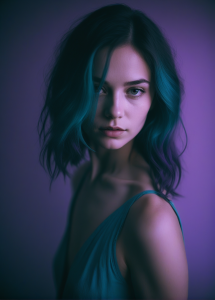
“Cool, neon scene with a film-noir vibe.”
We’ll turn that sentence into prompt words.
2) Light is the image’s “touch”
Two easy lighting setups
-
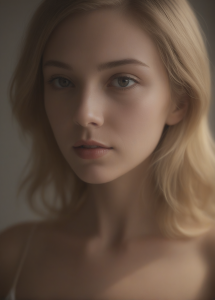
Soft directional light
Gentle shadows that “wrap” the face. Use it for calm, closeness. -
Rim light (edge light)
A thin band of light from the side/back tracing hair or shoulder. Adds elegance and sparkle.
Prompt phrases (EN):
-
“soft directional light, smooth falloff into shadow”
-
“subtle rim light from the left, light haze in the background”
Try to avoid: “flat, very bright light from all sides” — it kills mood and feels documentary.
3) Color = emotional temperature
Simple palette recipes (pick one)
-
Warm & calm: amber + apricot + cream
-
Neon noir: teal (shadows) + violet (highlights) + a touch of muted yellow
-
Monochrome & classy: shades of burgundy
Keep prompt language plain:
“warm highlights, cool shadows,” “burgundy + violet palette,” “neon teal in shadows.”
Rule of thumb: less is more. Choose 2–3 colors, not a rainbow.
4) Natural skin, not “plastic”
AI often over-smooths. Fix it with:
-
prompts like: “natural skin texture, subtle film grain, no plastic gloss”
-
edits: add light grain (2–5%), don’t crank clarity/sharpen on the face—accent fabrics and jewelry instead.
5) Ready-to-use prompt templates (copy/paste)
A) Warm, intimate frame (SFW)
Negative prompt:
plastic skin, flat lighting, blown highlights,

oversaturated colors, text, watermark |
 |
 |
B) Neon-noir (energy + elegance)
Negative prompt:
over-smoothing, plastic gloss, oversaturated colors, text/watermark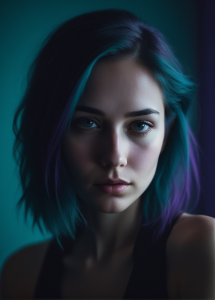 |
 |
 |
 |
6) A simple workflow (step by step)
-
Define mood (one sentence).
-
Write the prompt (lighting + palette + “natural skin”).
-
Generate 6–8 variations. Pick 1–2 best.
-
Gentle edits: light color grading (e.g., cool shadows, warm highlights), small grain, modest contrast tweak.
-
Upscale for lightbox (e.g., to 1536×2048 px).
-
Export for the web:
-
grid thumbnail: WebP ~ 450×600 px (≤ 80 kB),
-
lightbox image: WebP ~ 1500–2000 px long edge (≤ 600 kB).
-
-
SFW ALT text: “AI portrait, soft light, burgundy palette, subtle rim light.”
7) Quick fixes when “something’s off”
-
Too flat: add “low-key,” “soft directional light,” darken the background.
-
Too plastic: “natural skin texture,” add light grain, reduce specular shine.
-
Too loud: reduce saturation, go back to 2–3 colors, block “oversaturated.”
-
Too dark: brighten the subject (face/eyes) with a mask, not the whole image.
-
Missing sparkle: add a subtle rim light or a tiny highlight on jewelry/fabric.
8) Think like a photographer (easy wins)
-
Light steers the eye — the brightest area should be your focal point.
-
Texture contrast — matte skin + satin/jewelry sheen creates “tactile” interest.
-
Crop with intent — leave something just outside the frame to invite imagination.
9) Mini-glossary (no techno-babble)
-
Low-key — mostly dark with gentle highlights; intimate and elegant.
-
Rim light — a thin edge of light outlining a subject.
-
Split lighting — side light divides the face into light and shadow.
-
Grain — subtle “film dust” that avoids sterile, plastic look.
Wrap-up
Mood = light + color + restraint. Name the emotion first, then pick soft lighting and a short palette. Give skin some air (texture, not plastic), add a hint of grain, and guide the eye to one clear subject. AI will generate an image — you build the atmosphere.